Block callers: how to set up a blacklist
Send unwanted numbers to a busy signal: create a blacklist group, turn on “Block calls”, assign contacts – done.
In the app: AI Telephony → Contacts → Groups
Sales calls, repeat nuisance callers, numbers you simply don't want to deal with: with a blocked group in your address book, your system rejects these callers instantly – they only hear a busy signal, and no conversation takes place. Setup takes a minute; after that, blocking a new number takes two clicks.
How to set it up
- Open Contacts (“Kontakte”) and click Groups (“Gruppen”) in the top-right corner.
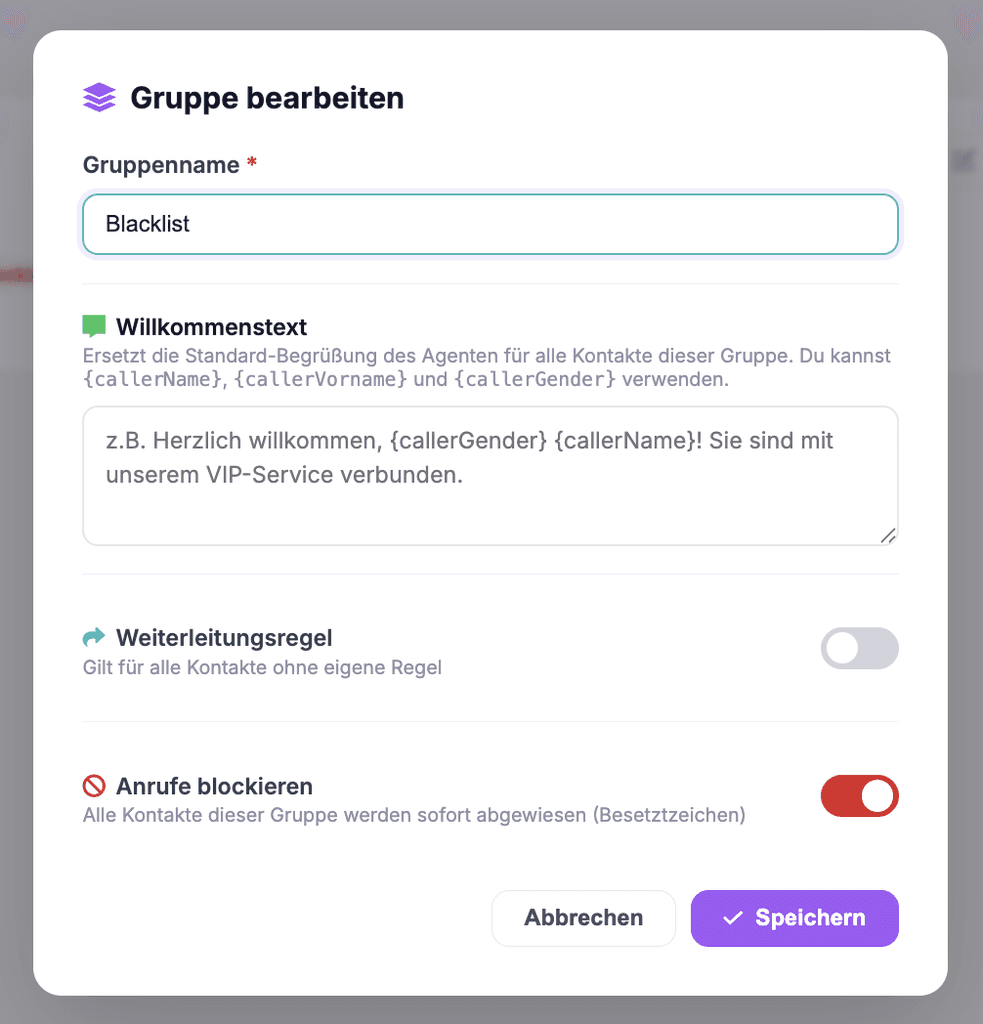
- Create a group with + New group (“+ Neue Gruppe”) – e.g. “Blacklist” – or edit an existing one using the pencil icon.
- In the group window, turn on the Block calls (“Anrufe blockieren”) toggle – all contacts in this group are rejected immediately (busy signal) – and click Save (“Speichern”). The group now shows a Blocked (“Blockiert”) label in the overview.
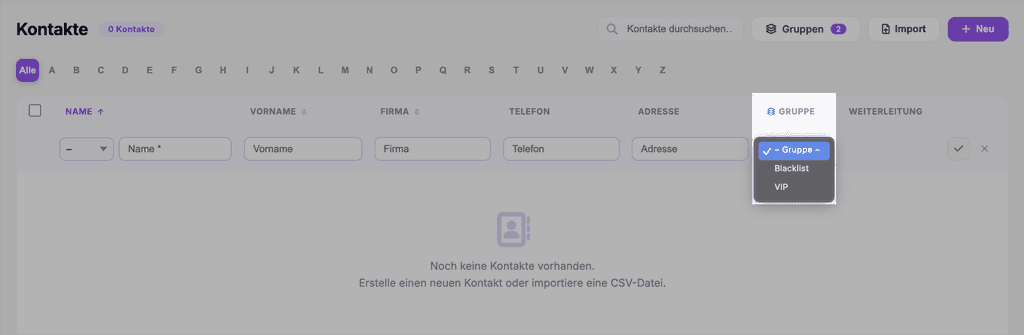
- Assign the number to the group: create a contact in the contact list (a name and phone number are enough) or edit an existing one, and choose your blacklist in the Group (“Gruppe”) field.
Real-world example
A trade business got the same sales call several times a week. The fix took one minute: a contact called “Sales call XY” was created with the number and assigned to the blacklist – since then, the caller only hears a busy signal, and the team no longer gets pulled away from work.
Where: AI Telephony (“KI-Telefonie”) → Contacts → Groups button
Good to know
- Discreet: The blocked caller hears a normal busy signal – they won't know they're on a blacklist.
- Instantly applies to the whole group: Blocking another number just means creating a contact and assigning the group. You never have to touch the blocking setting itself again.
- Address book rules apply to agents that have the address book enabled (Agents → General tab → Enable address book, “Adressbuch aktivieren”).
- Groups can do the opposite, too: Instead of blocking, you can greet regular customers with their own welcome message, including their name, and put them straight through – see the related articles for more.
Last updated July 16, 2026
Related
- Create & manage groups: rules for many contacts at onceGroups bundle contacts under shared rules: a custom greeting, transfer to a number or agent – or blocking.
- Personalized greetings with variables: “Hello {callerVorname}!”Greet known callers by name: how to use {callerVorname}, {callerName} and {callerGender} in a group's welcome text.
- Forwarding Rules: Contact vs. Group – Which One WinsOff, Number or Agent: forwarding rules can be set per contact and per group. Here's how they work together – and which rule takes priority.